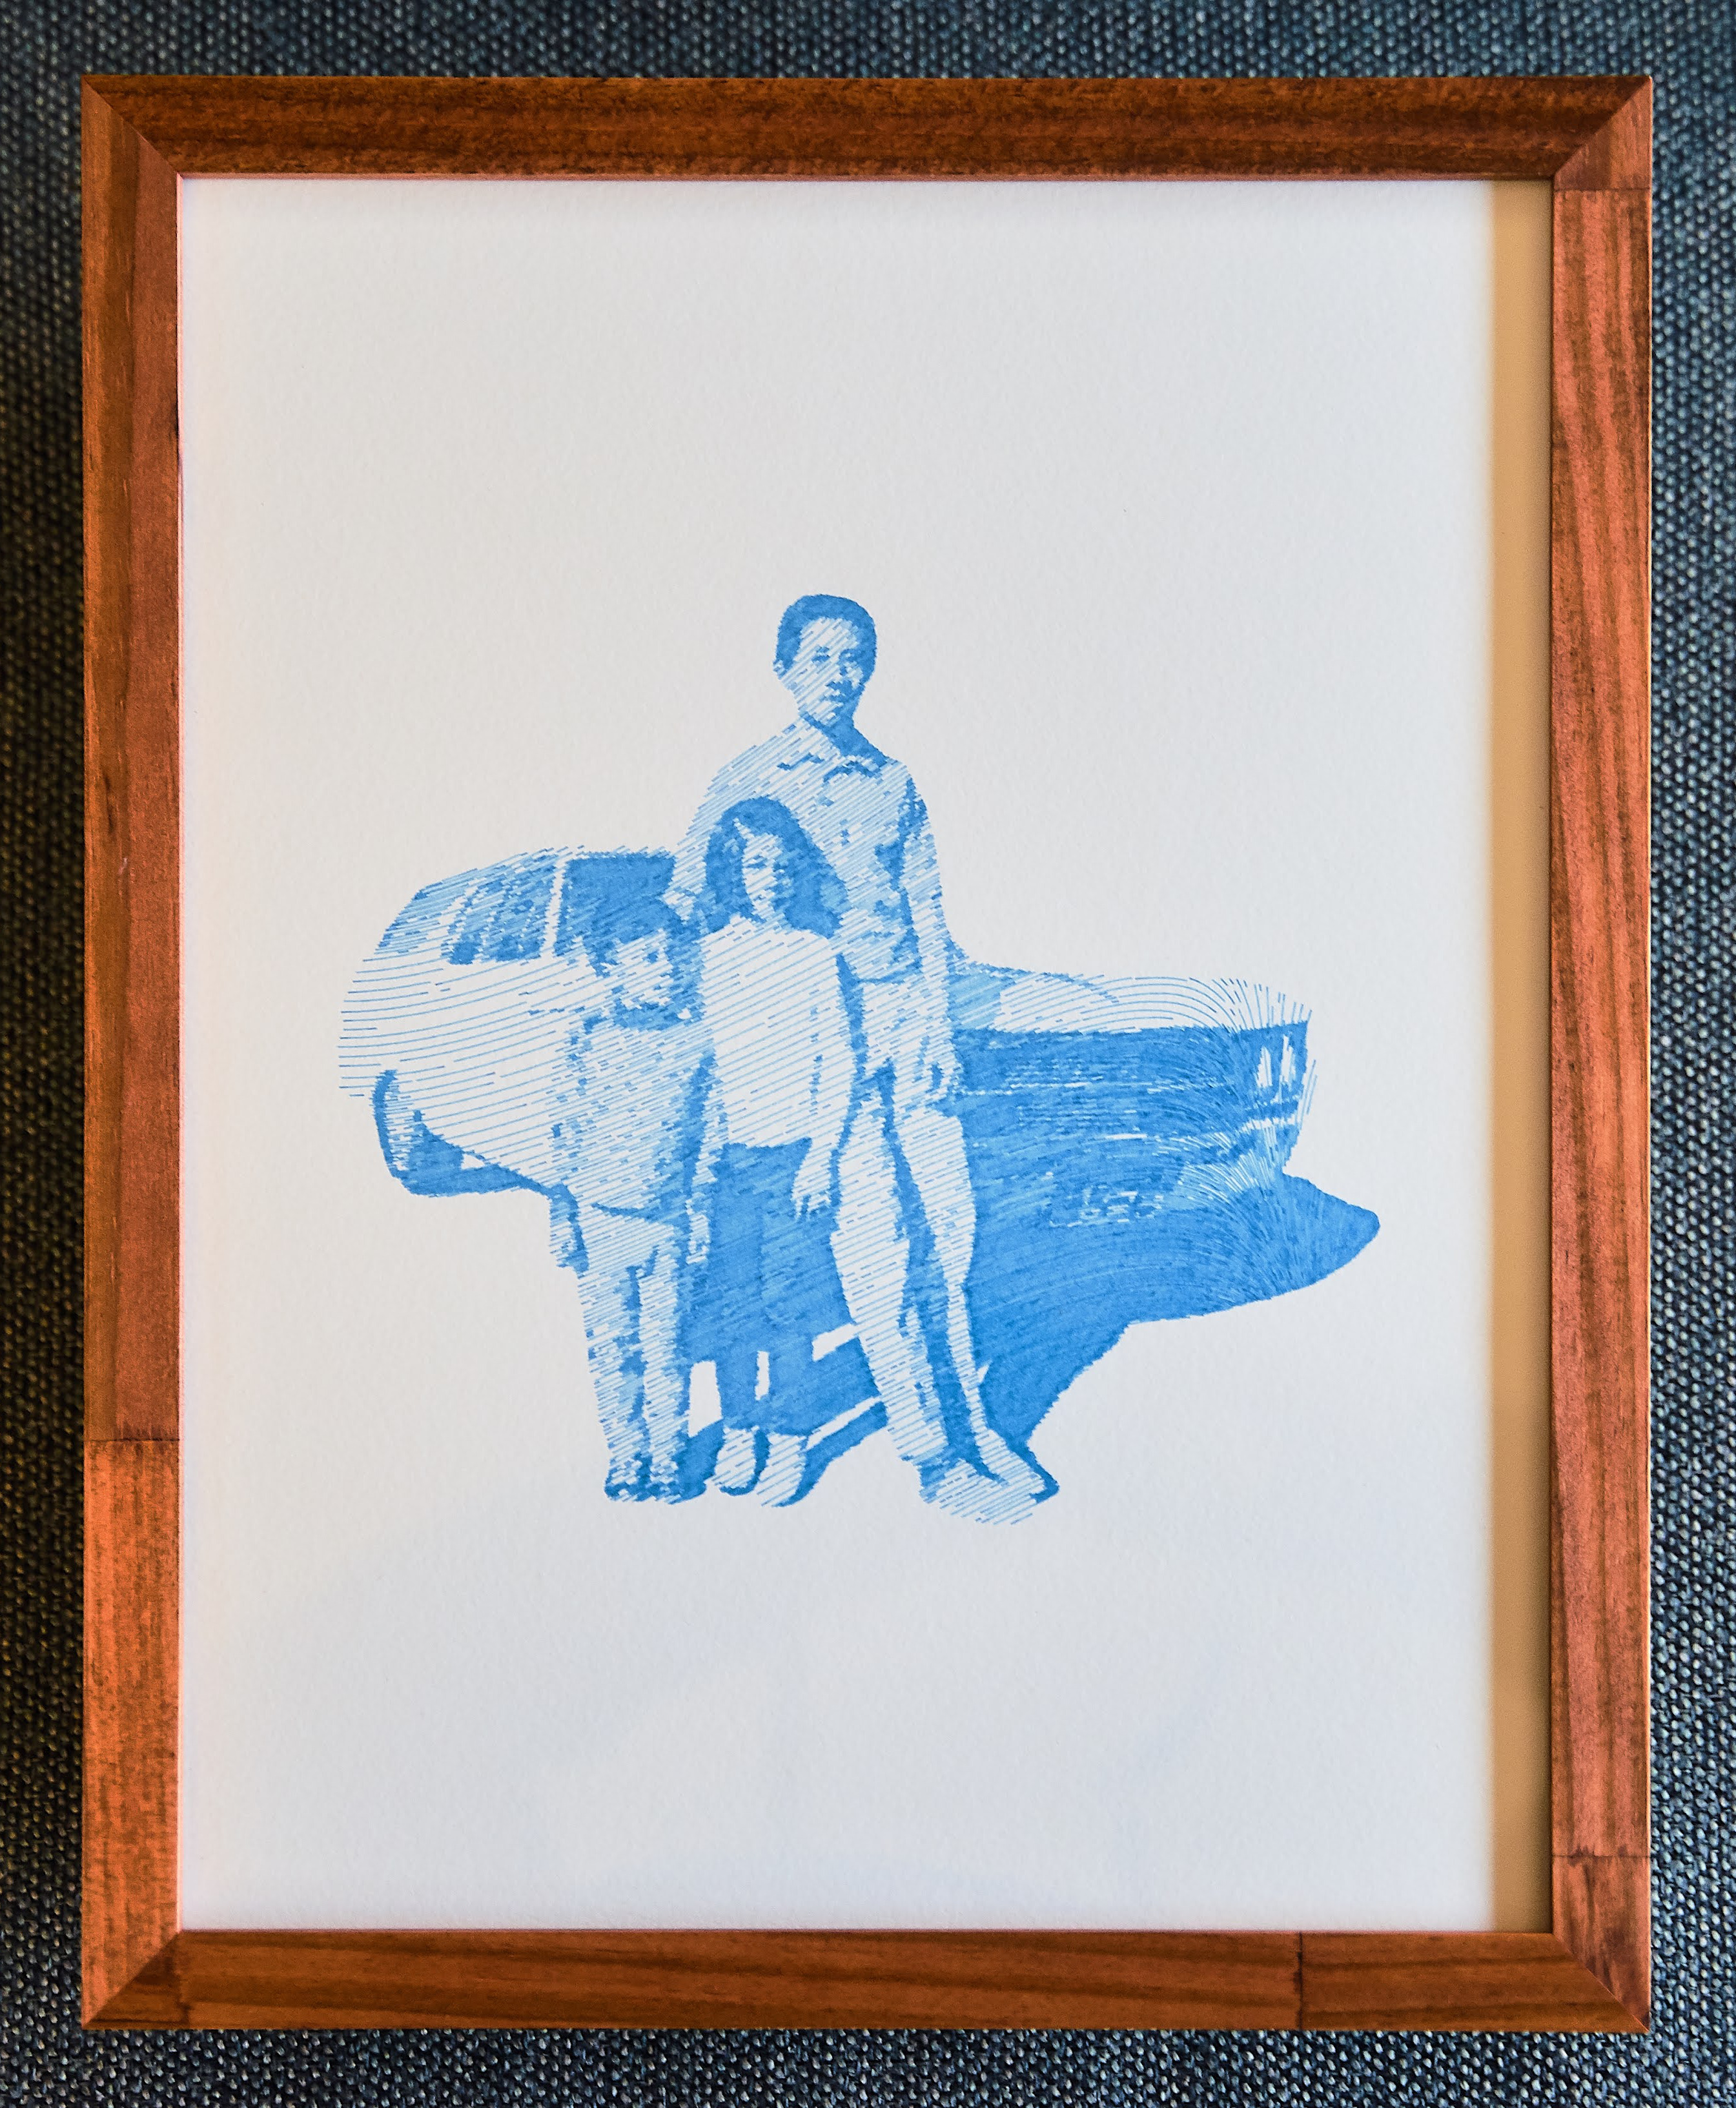
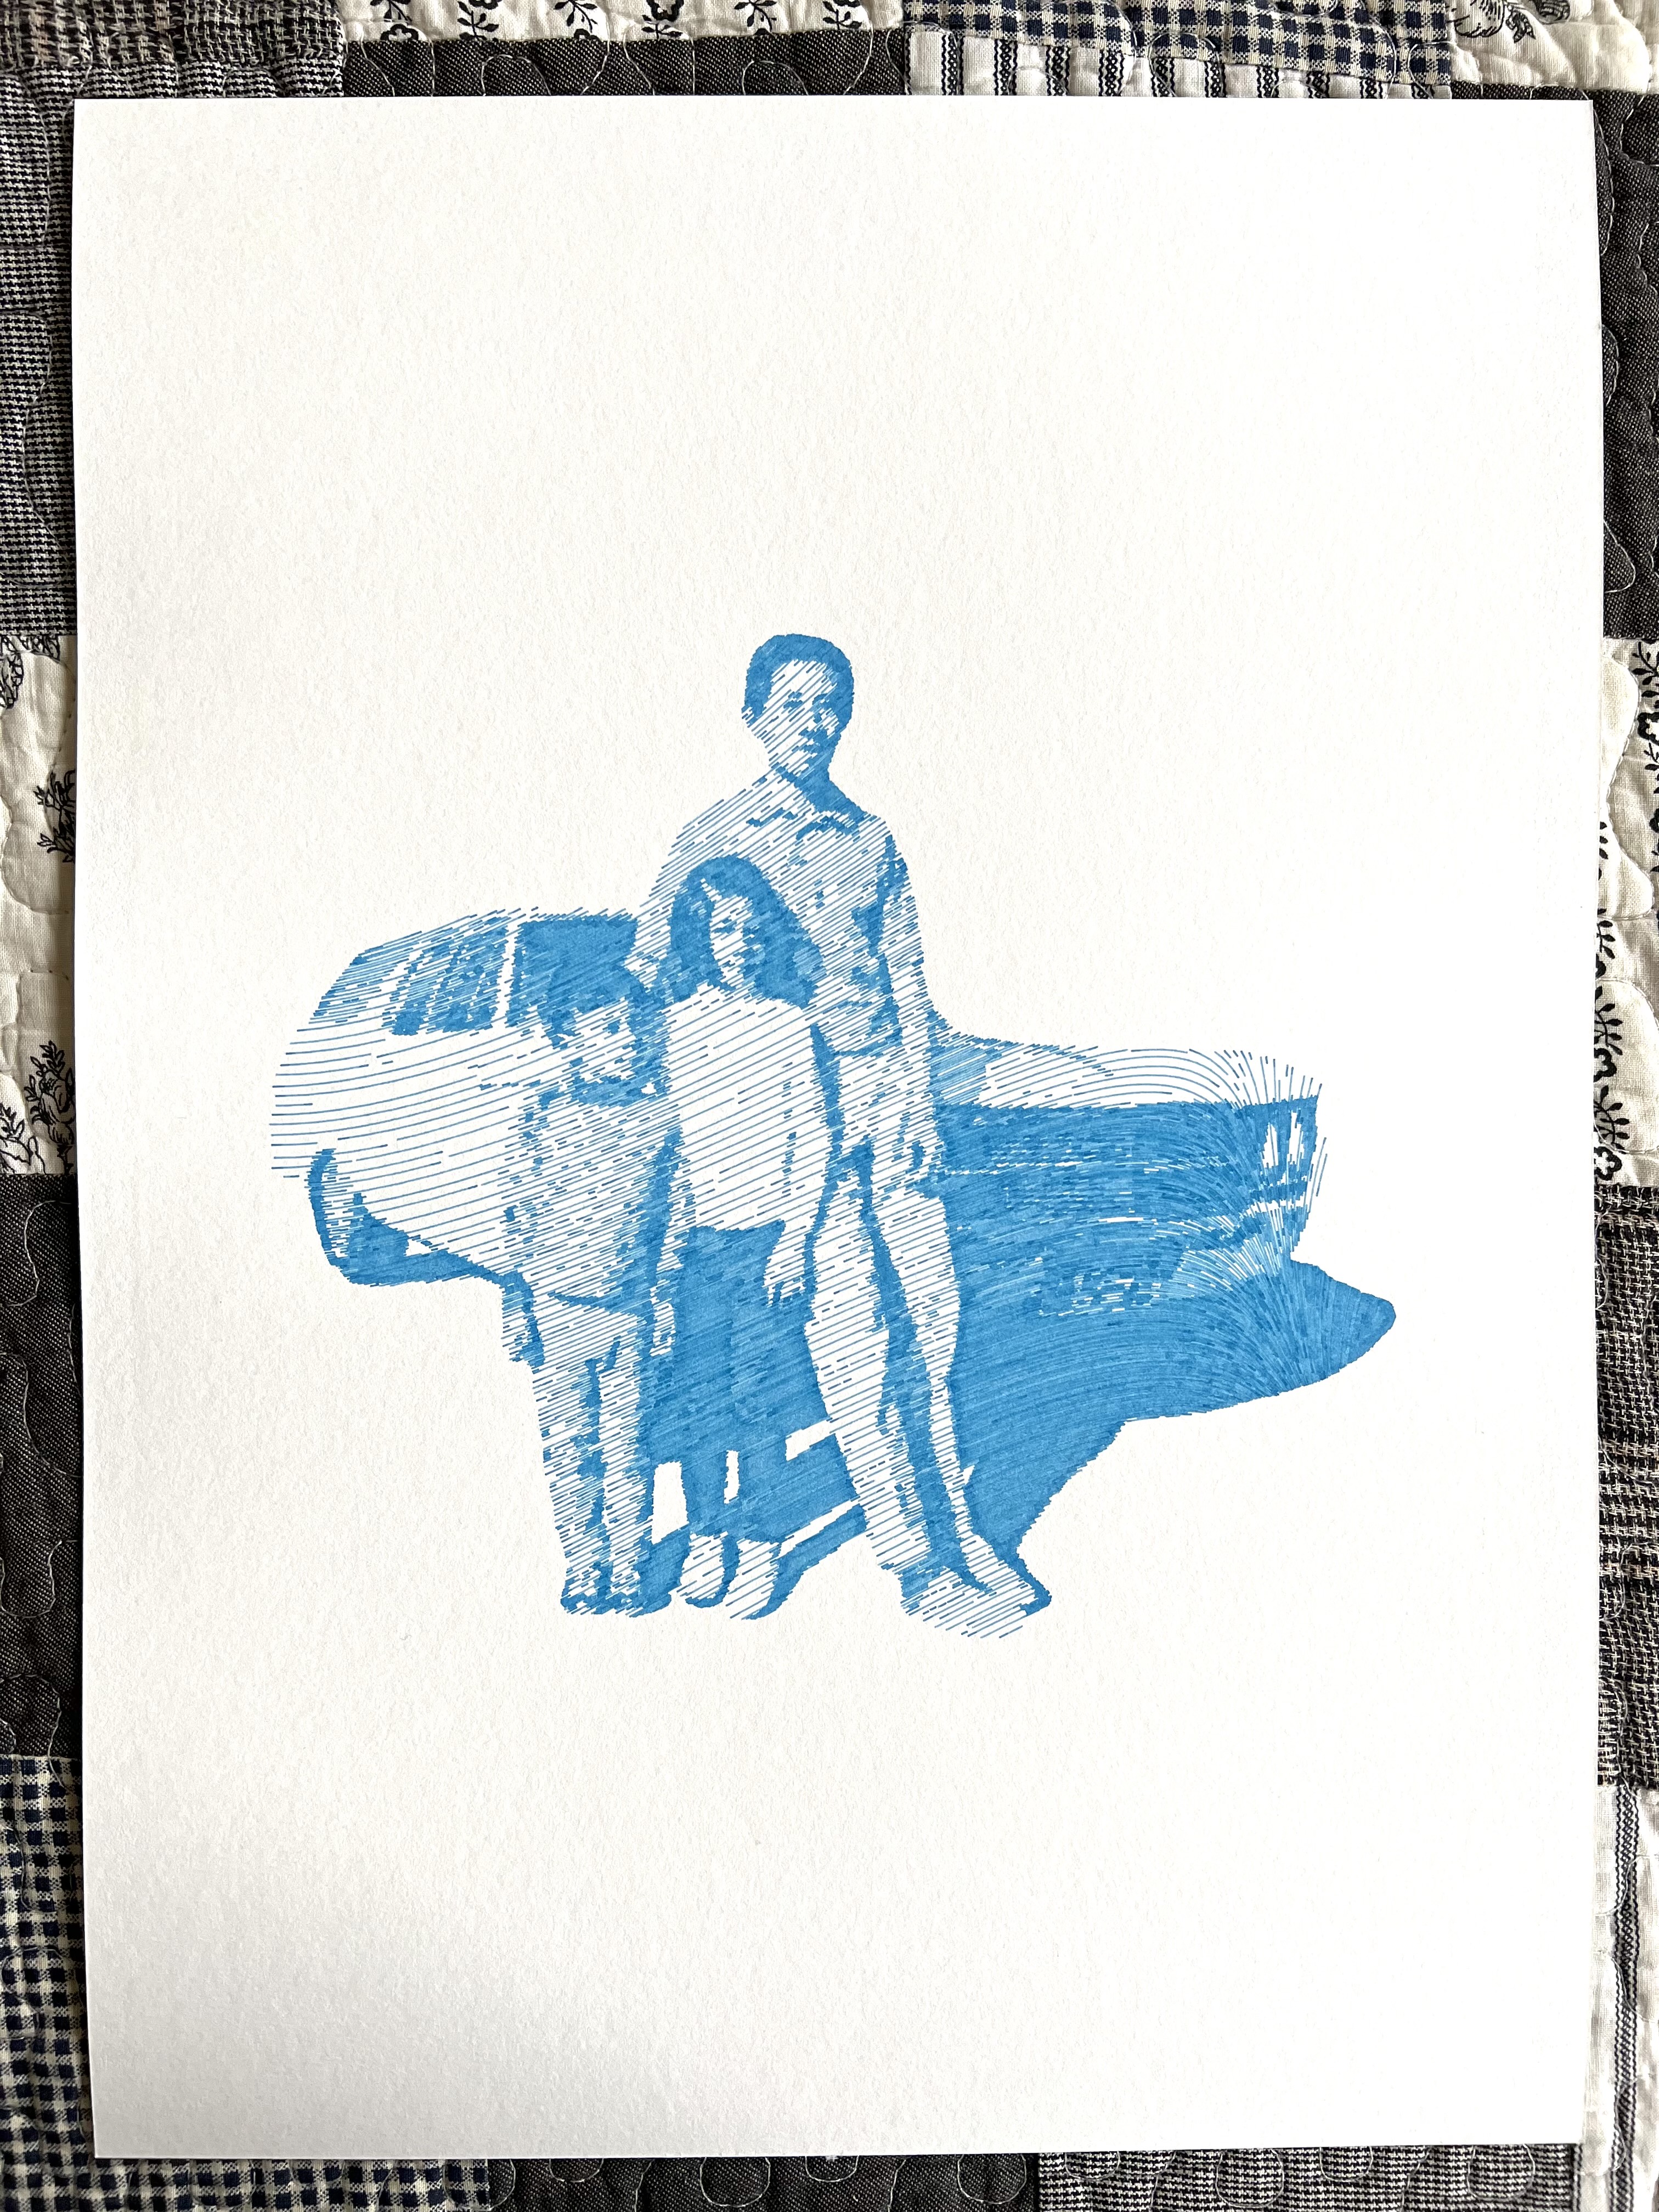
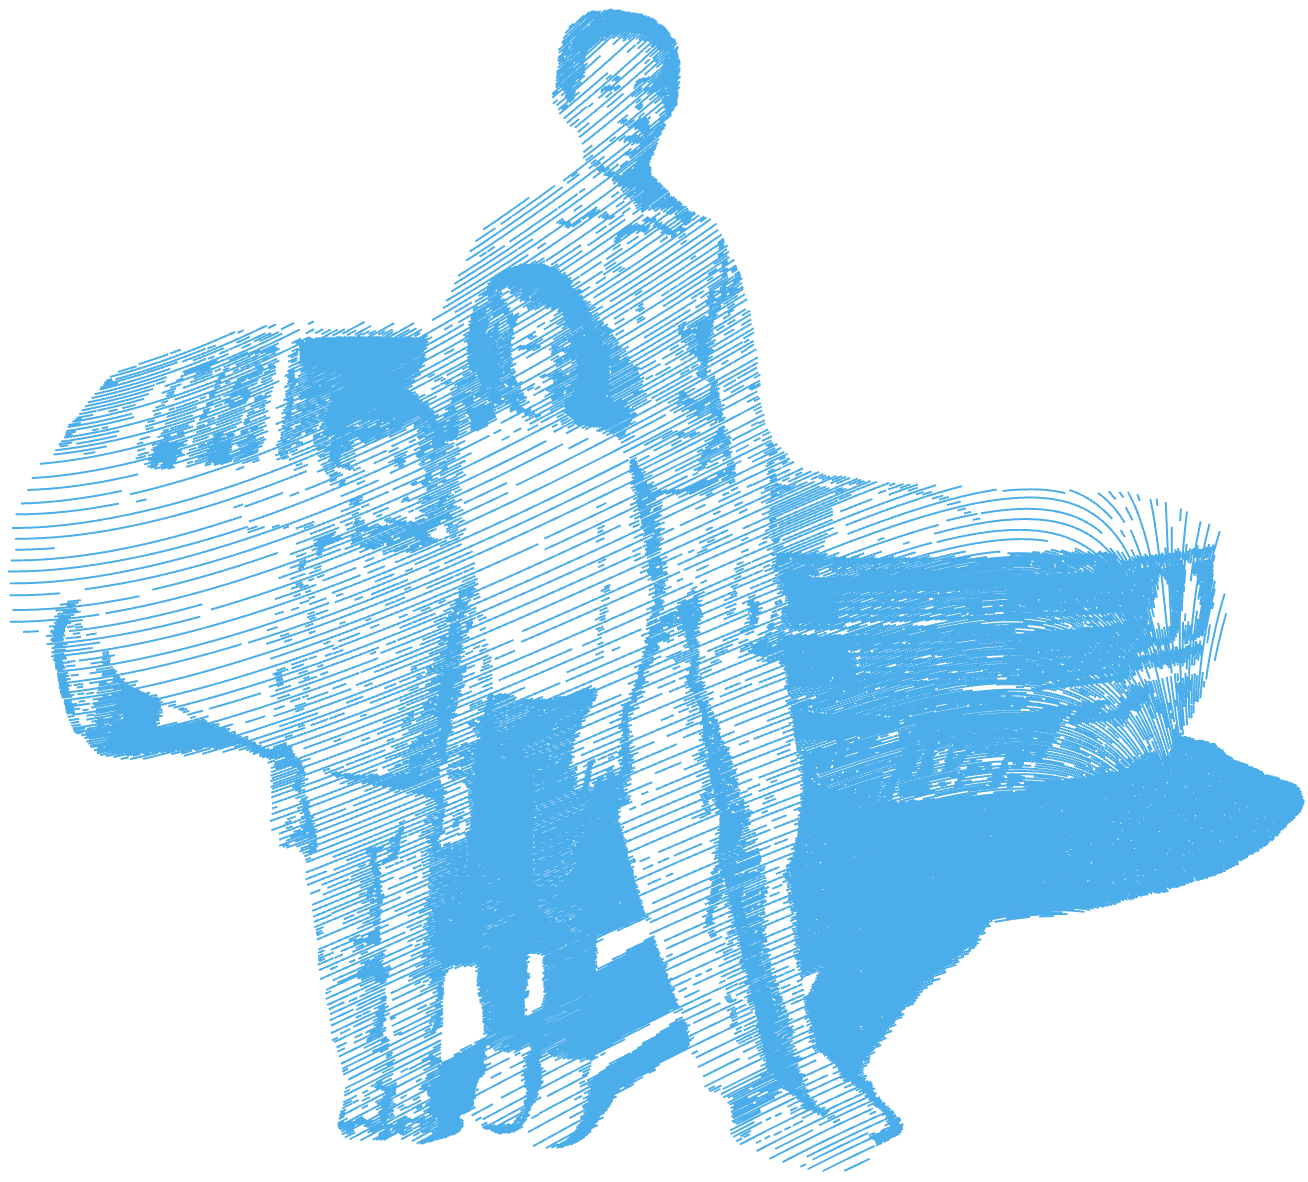
 A portrait of my dad, aunt, and grandfather. The piece is a heavily processed and vectorized version of an old photo of the three of them, plotted on watercolor paper.
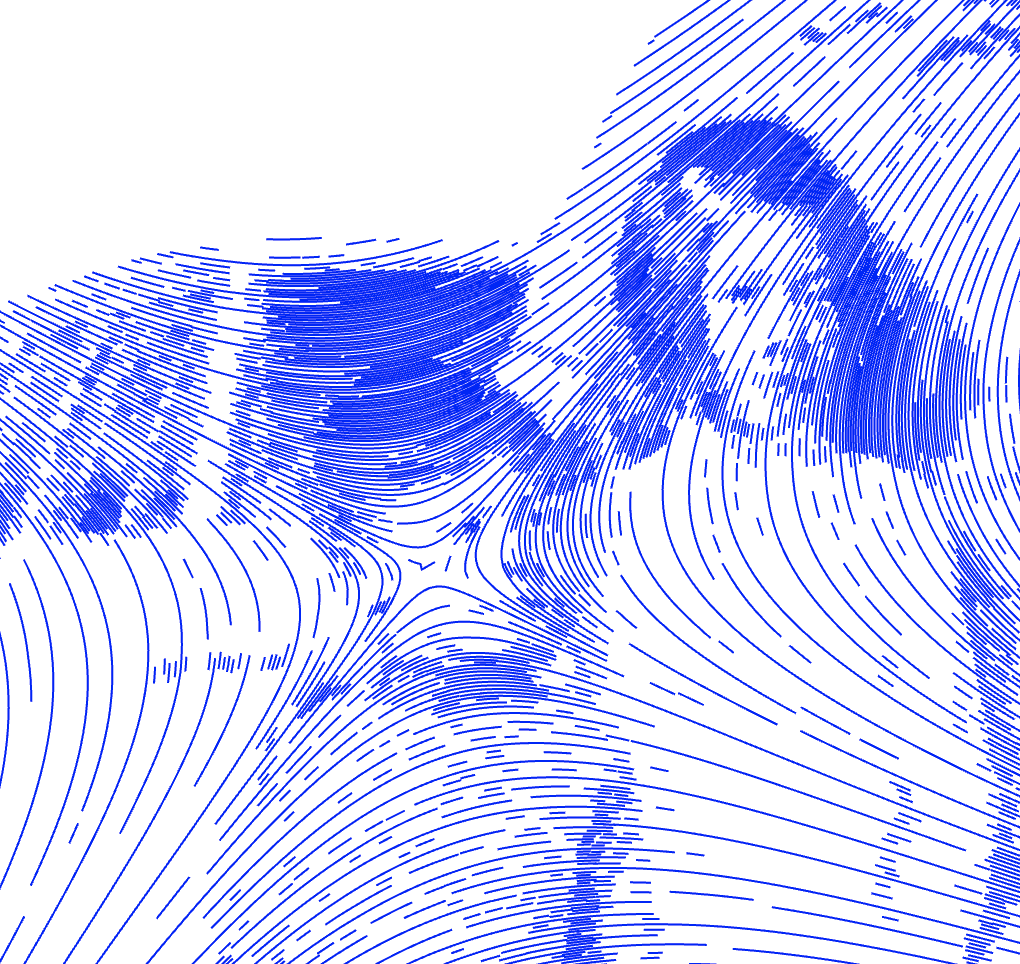
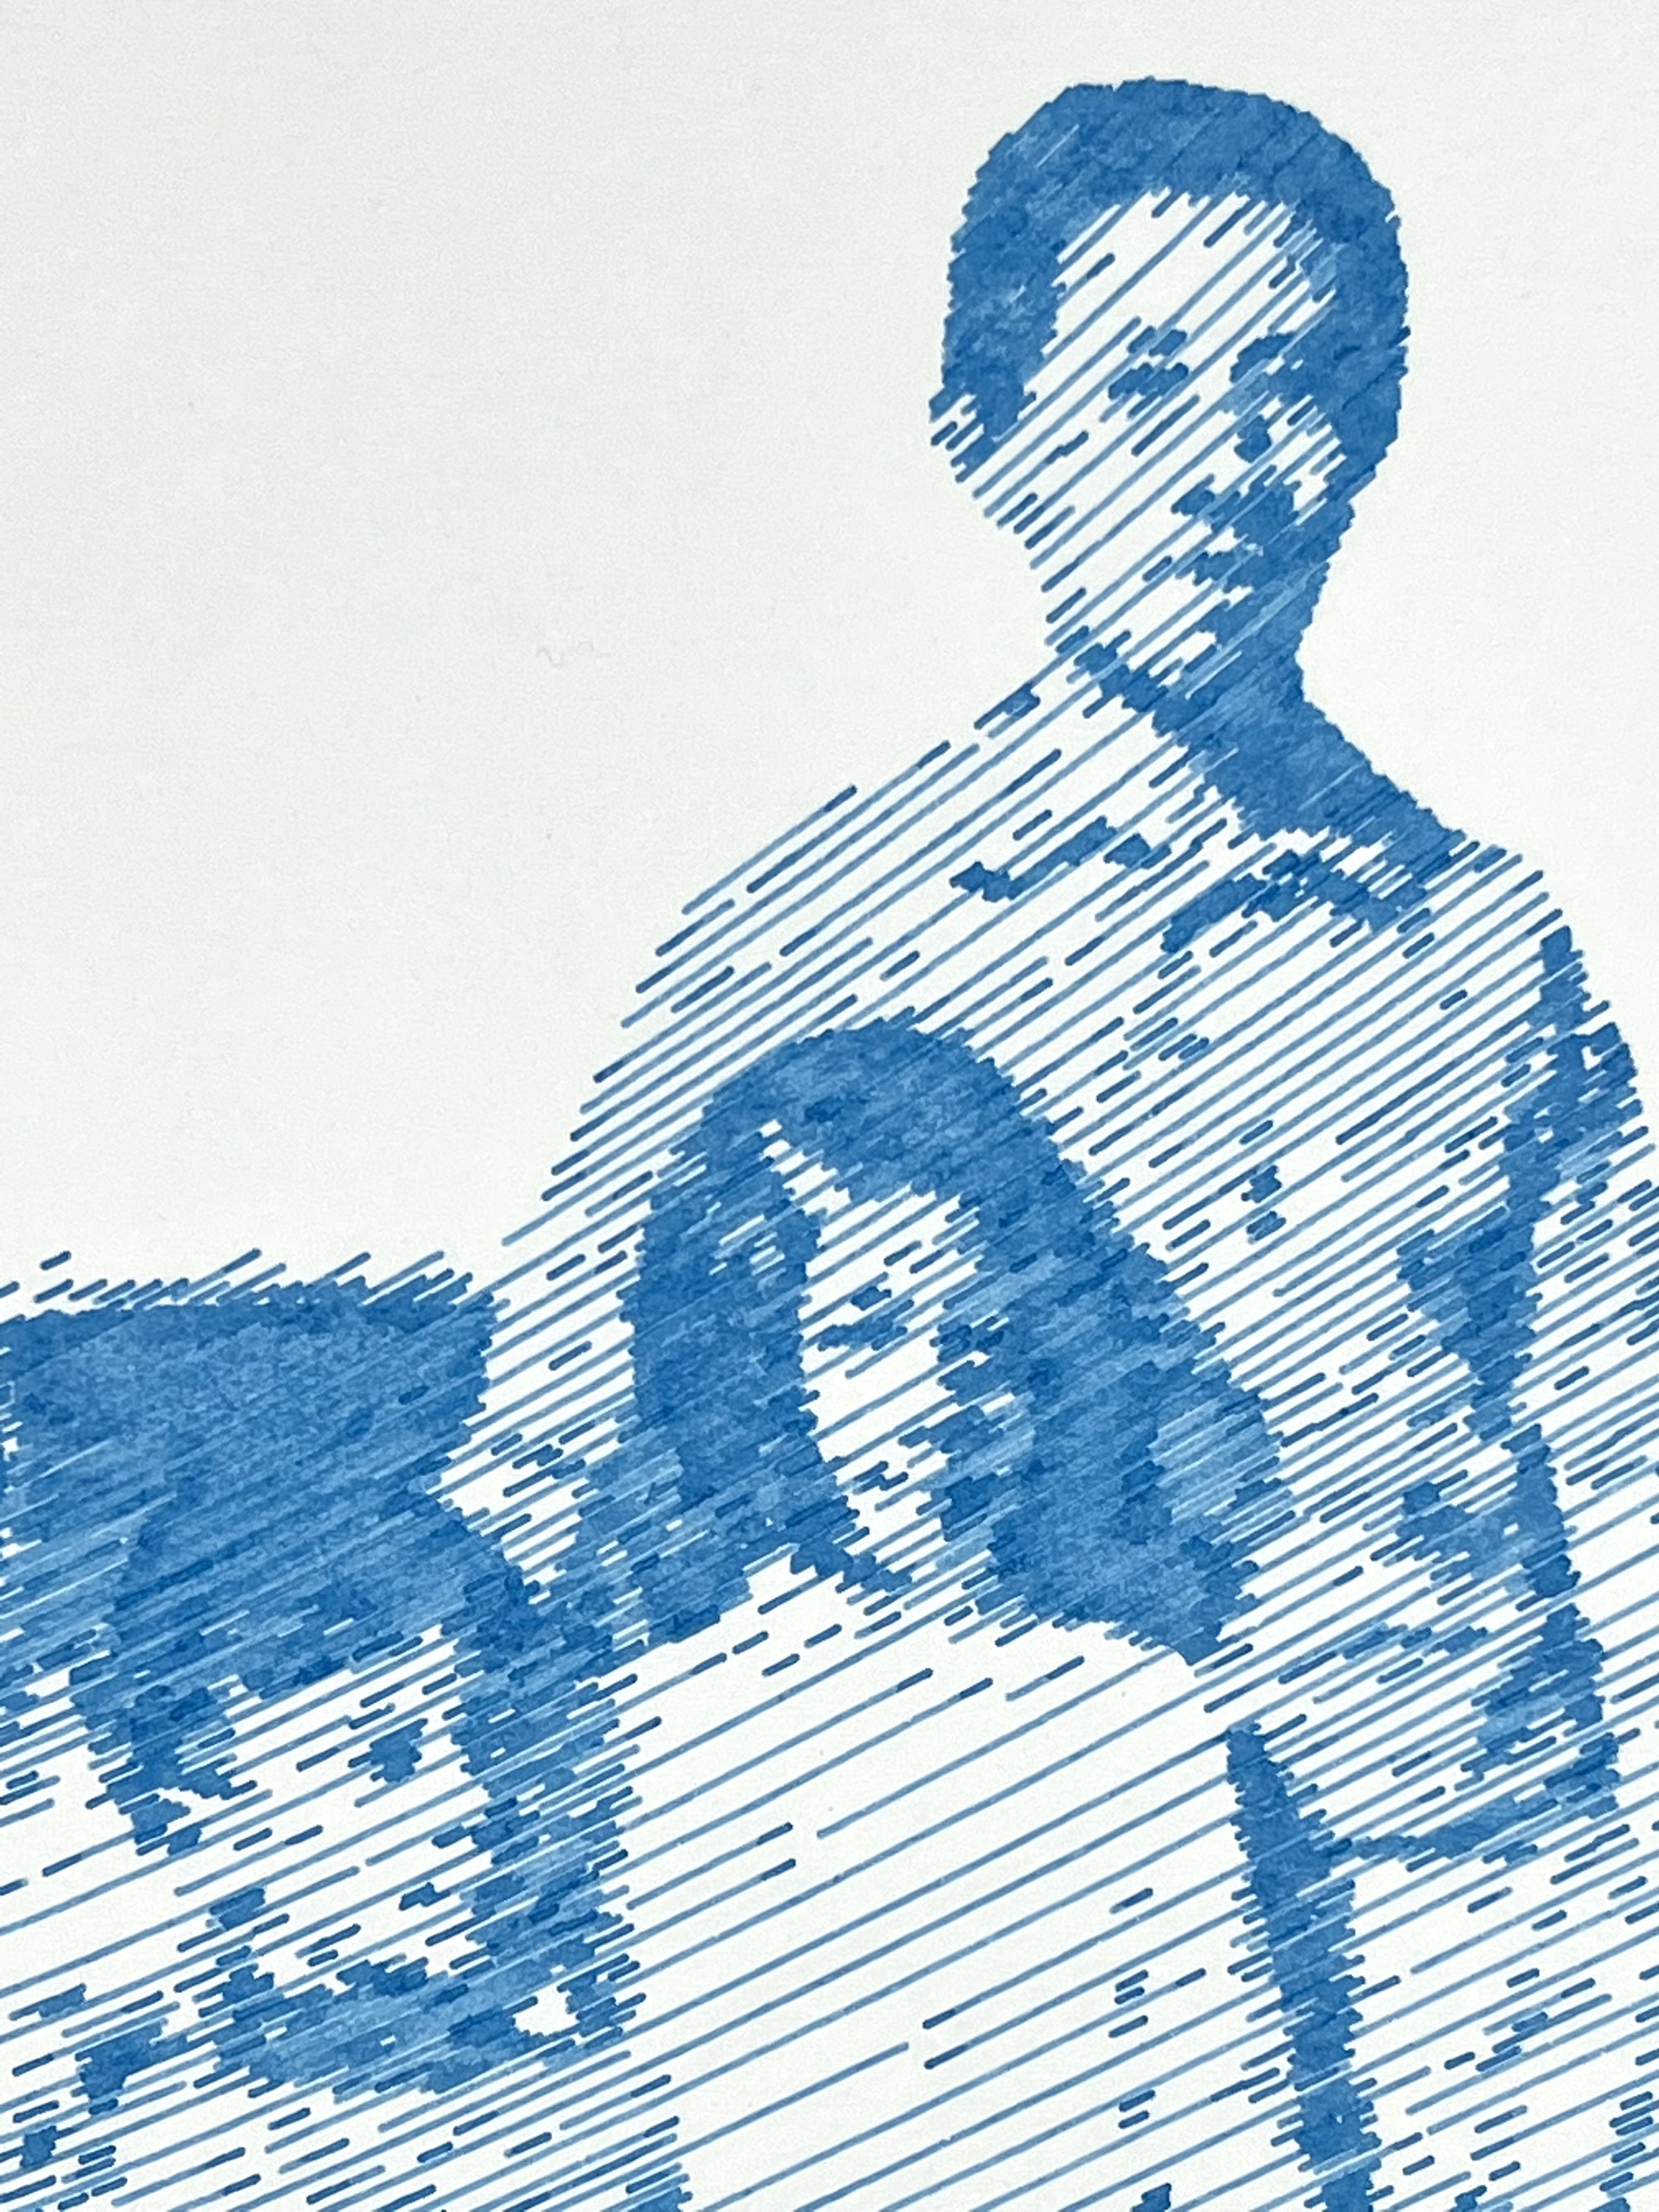 A closeup of some of the texture generated by the pen plotter. Plotting gives a lot of subtle variation that you don’t get from normal printers.
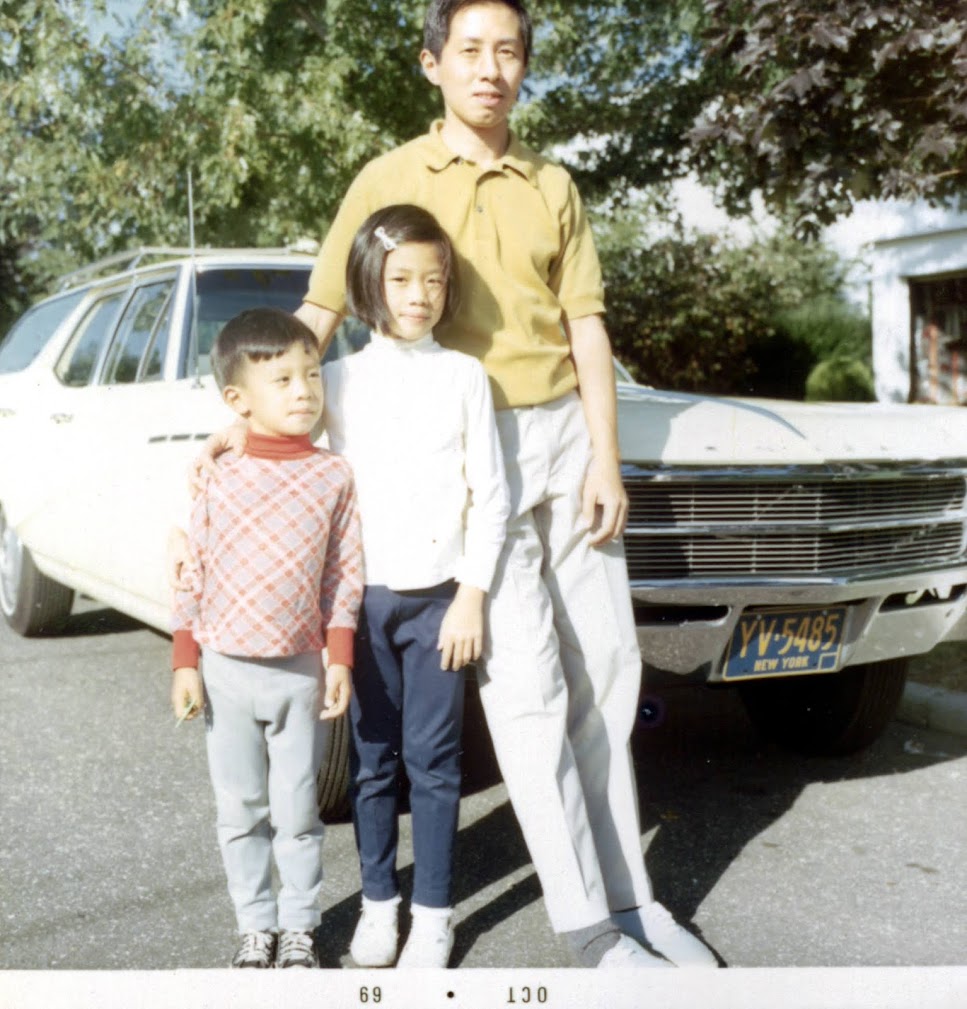
While looking through old family photos, I really fell in love with one of my dad and aunt as kids, standing with my grandfather in front of their station wagon. I wanted a large physical version for my wall, but didn’t want to just blow up a low-resolution JPEG and print it out. So, I figured I’d try my hand at artistically recreating the photo and plotting it with a pen plotter.
In this post, I document all of the steps I took to turn an old picture into a piece of plotter art. I assume basic familiarity with command line tools, but otherwise hope most reasonably computer-literate people will be able to follow along and generate some art of their own.
Image Vectorization
Plotters are essentially robot line-drawing machines. Given a list of lines and curves, a plotter will physically move a pen around a piece of paper and draw each one. The one big advantage of plotting vs. printing is that images can be plotted at any size with no loss in resolution. Whereas normal printed images will start to show their individual pixels when blown up to a large size, plotted images will keep their smooth, continuous lines without becoming blocky or jagged.
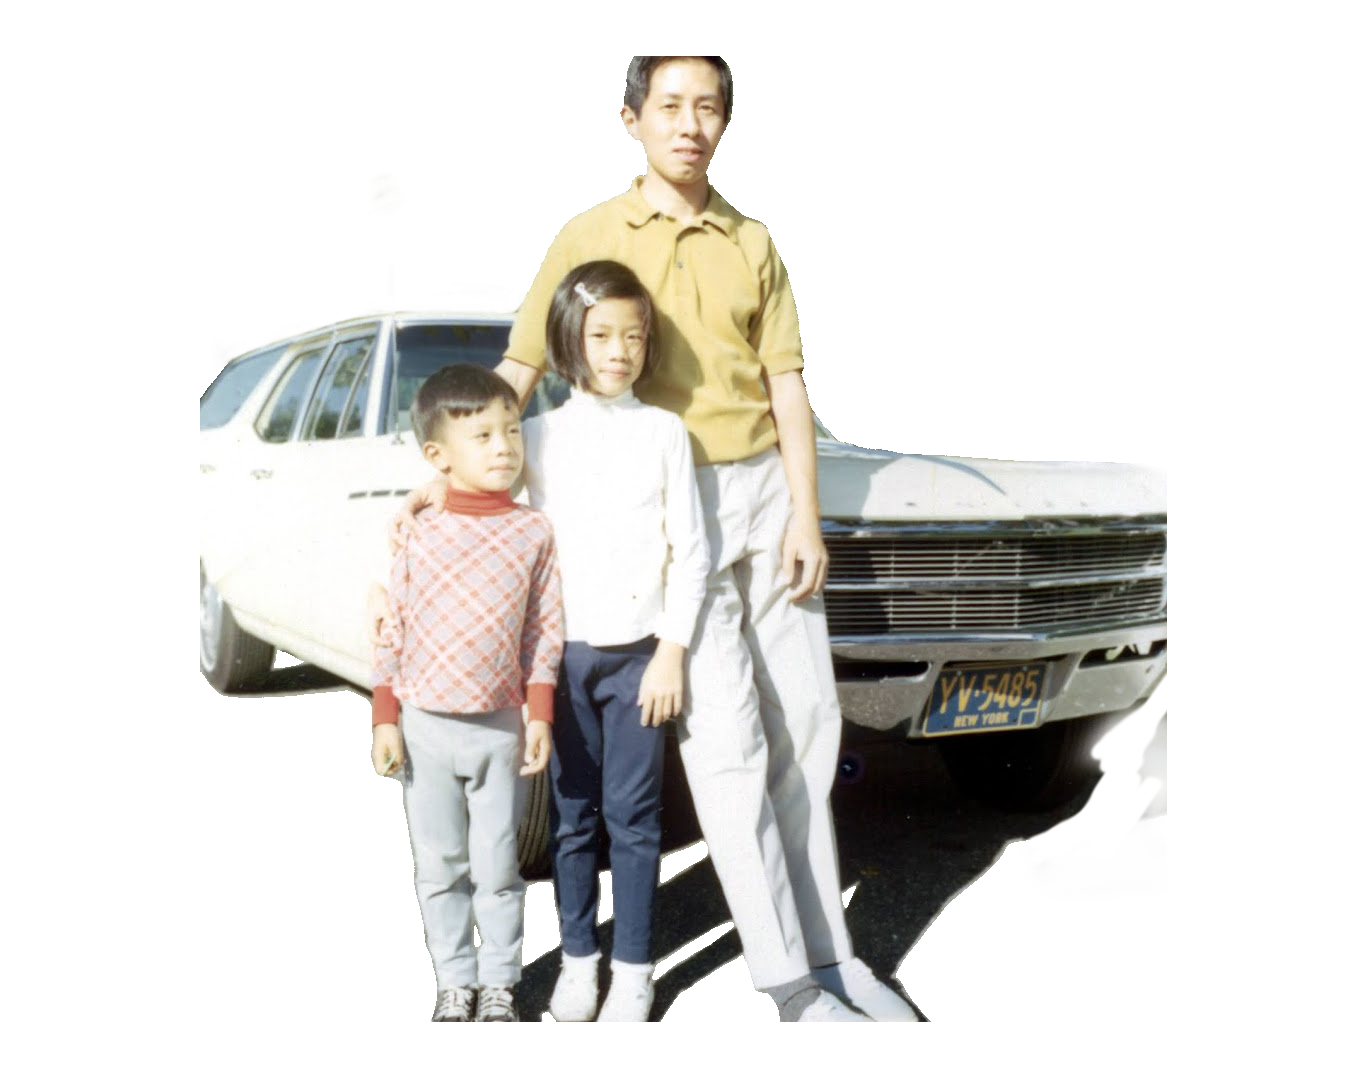
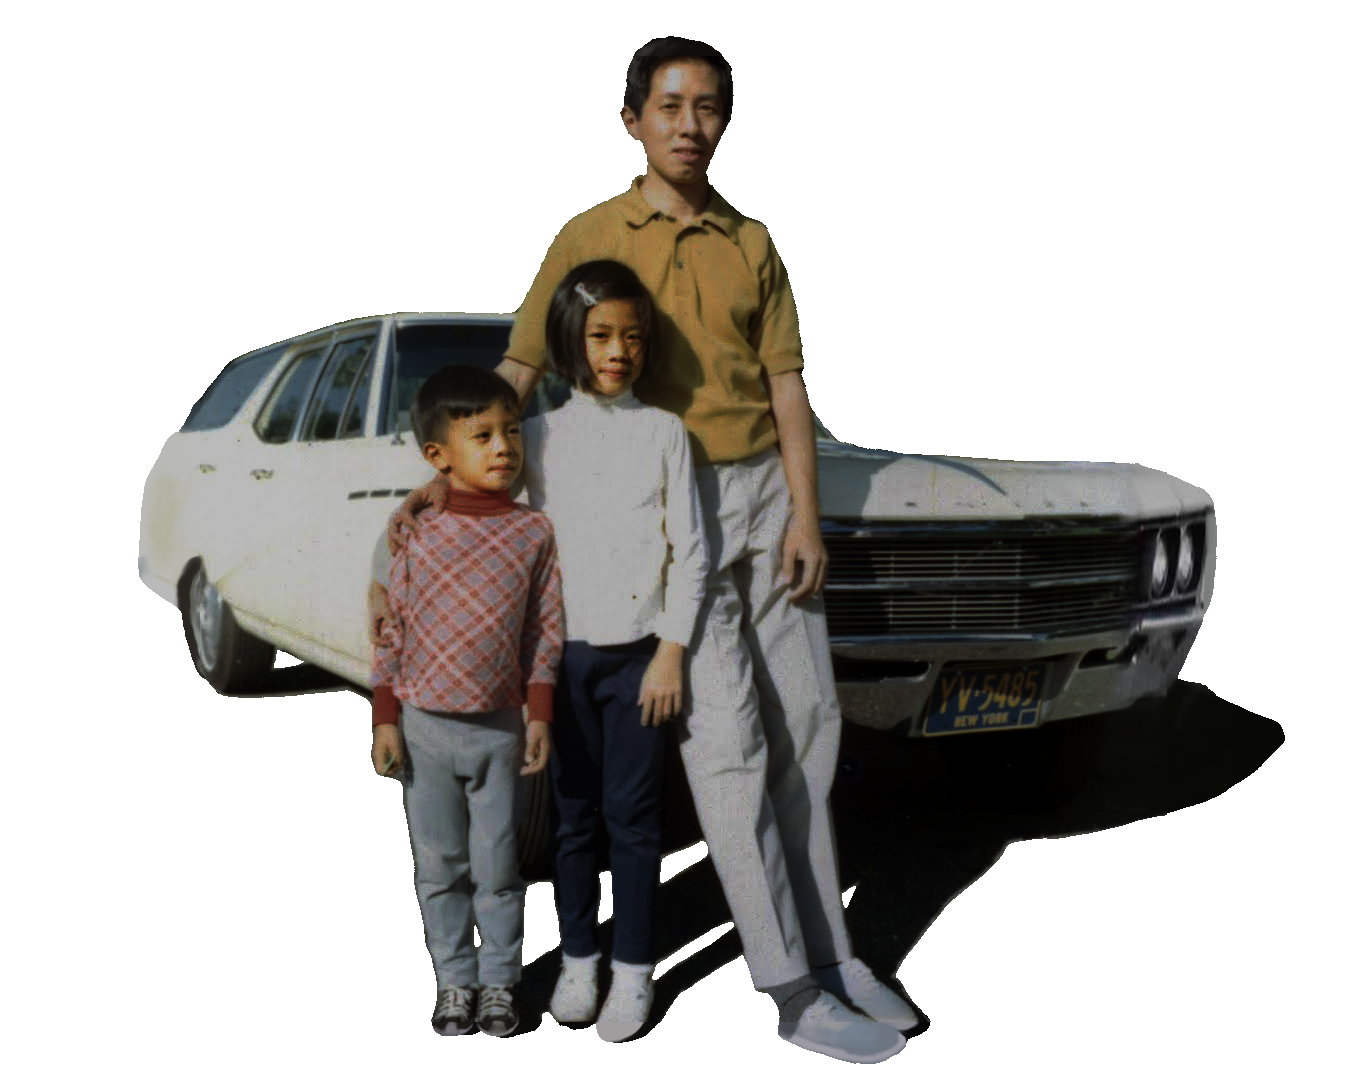
Cameras do not output lines and curves directly - they output pixels (or exposed film which is converted to pixels 50 years later.) As such, normal image files cannot be drawn by plotters. Instead, any image that you want to plot using a pen plotter needs to first be converted from pixels to lines and curves. This conversion process is called vectorization, as we’re converting from a raster (pixel-based) image format to a vector (shape-based) one. Here’s the original raster image that I want to vectorize:
Much like there are many different styles of drawing, there are many different ways to convert an image to a vector format. You can trace the outlines of shapes, you can do some crosshatch shading, or you can even draw everything from a single continuous line like this piece by artist Samer Dabra. The style I opted for is based on flow fields, and creates an image with a bunch of swirly, parallel lines. I really like the smooth, flowing quality of this style, and feel that it fits the original picture well.
With enough artistic ability and patience, one could draw something like this manually. Lacking those attributes, I chose to use this flow imager tool, which creates flow field vectorizations of image files based on parameters that you provide. This plugin is built on a cool Python toolkit called vpype that allows people to generate and modify vector graphics with code. If we install the flow imager tool and run it on our source image with all the default settings, we get something like this:
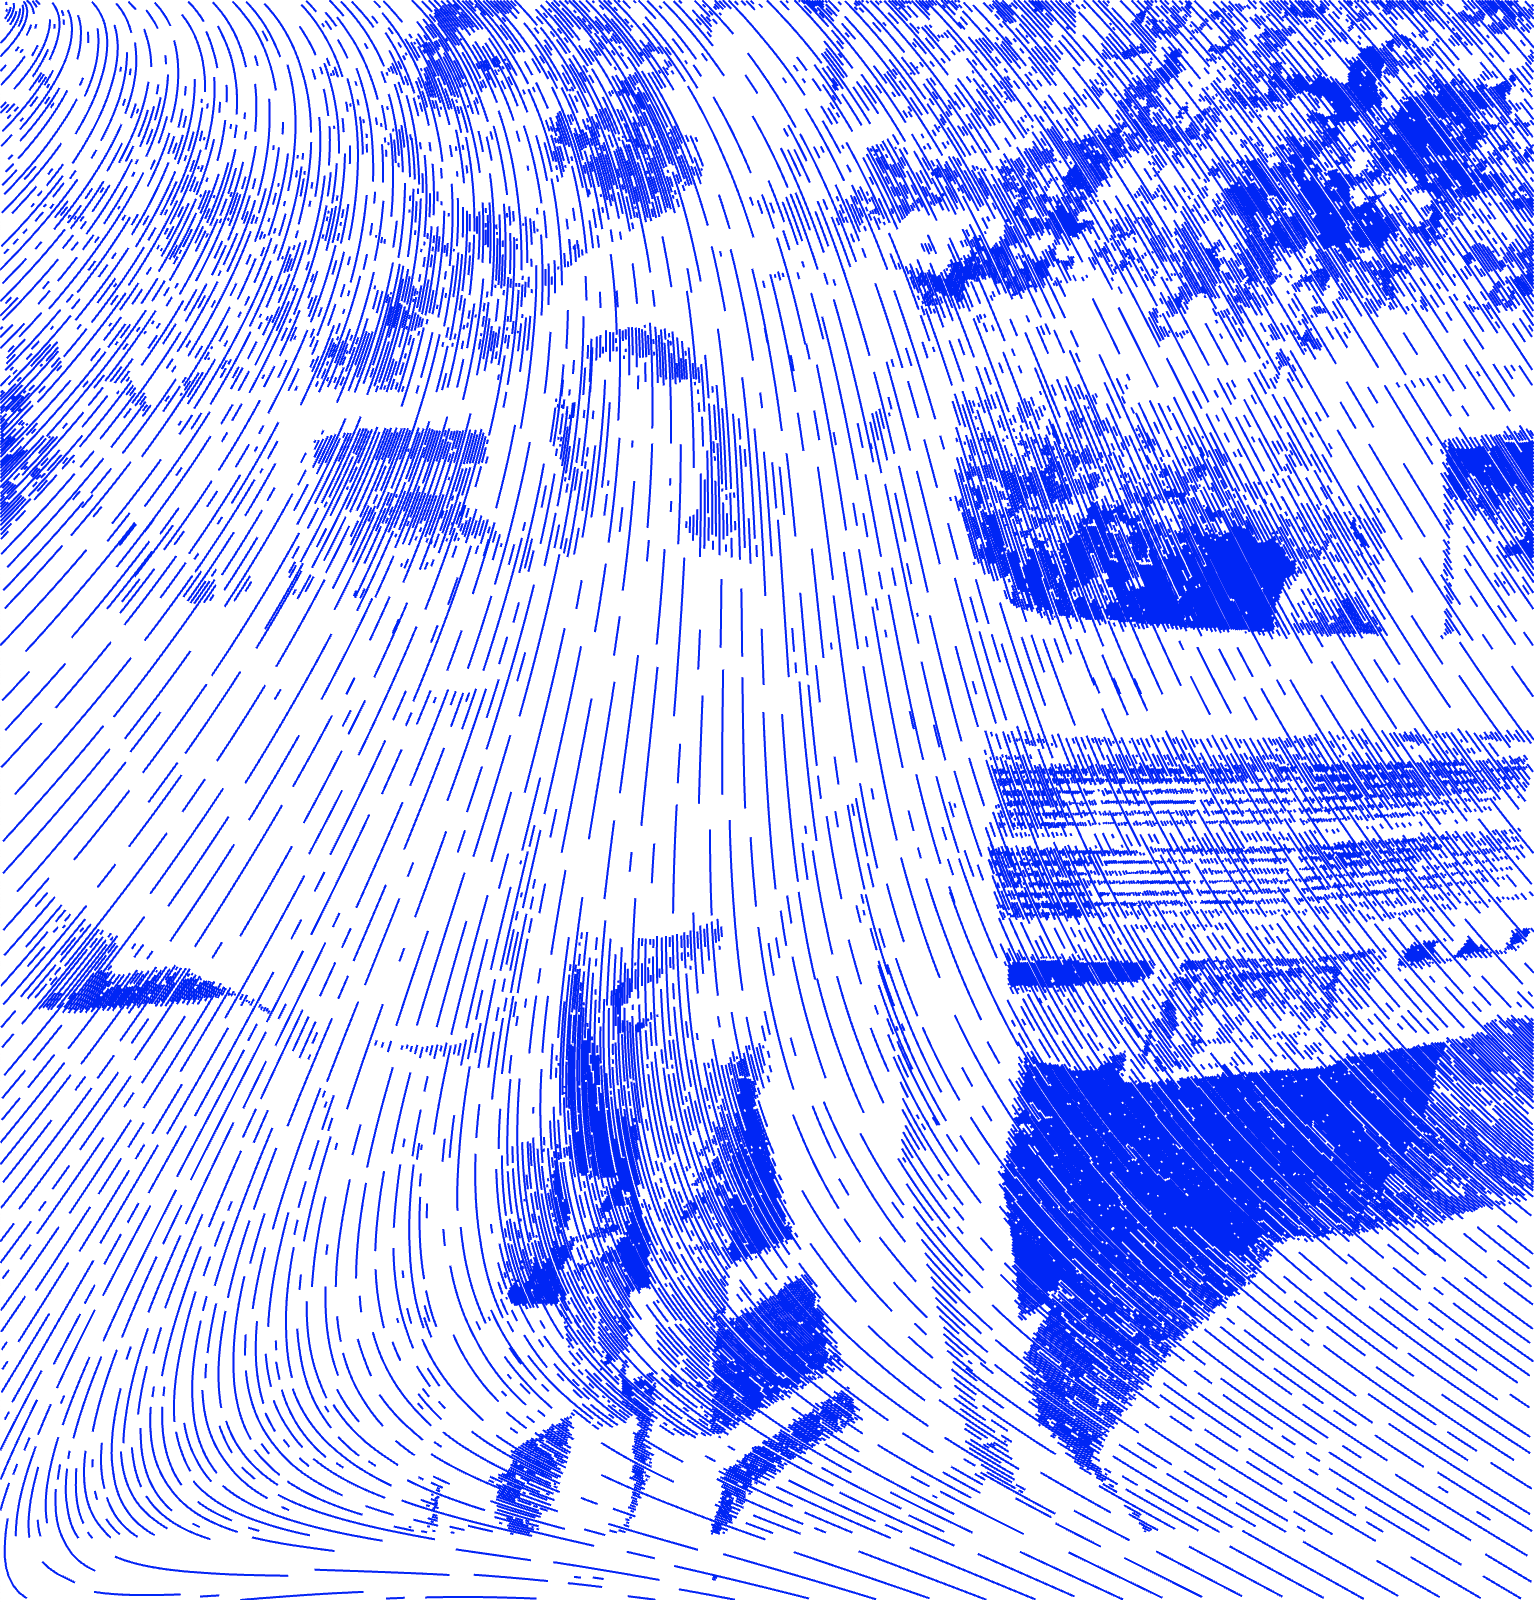
vpype flow_img original.jpg write vector.svg
As you can see, there are a few problems. The trees in the background look like brewing storm clouds, and my family members have no eyes or mouths (or legs in the case of my dad, who looks like he’s being swept away into the ether.) It looks cool, but it’s got a really intense, foreboding vibe to it - not exactly what I want to hang on my wall. I want the final product to show my (recognizable) family and their car on a blank background. To get the computer to vectorize in this way, we’re going to need to do some tweaking and preprocessing.
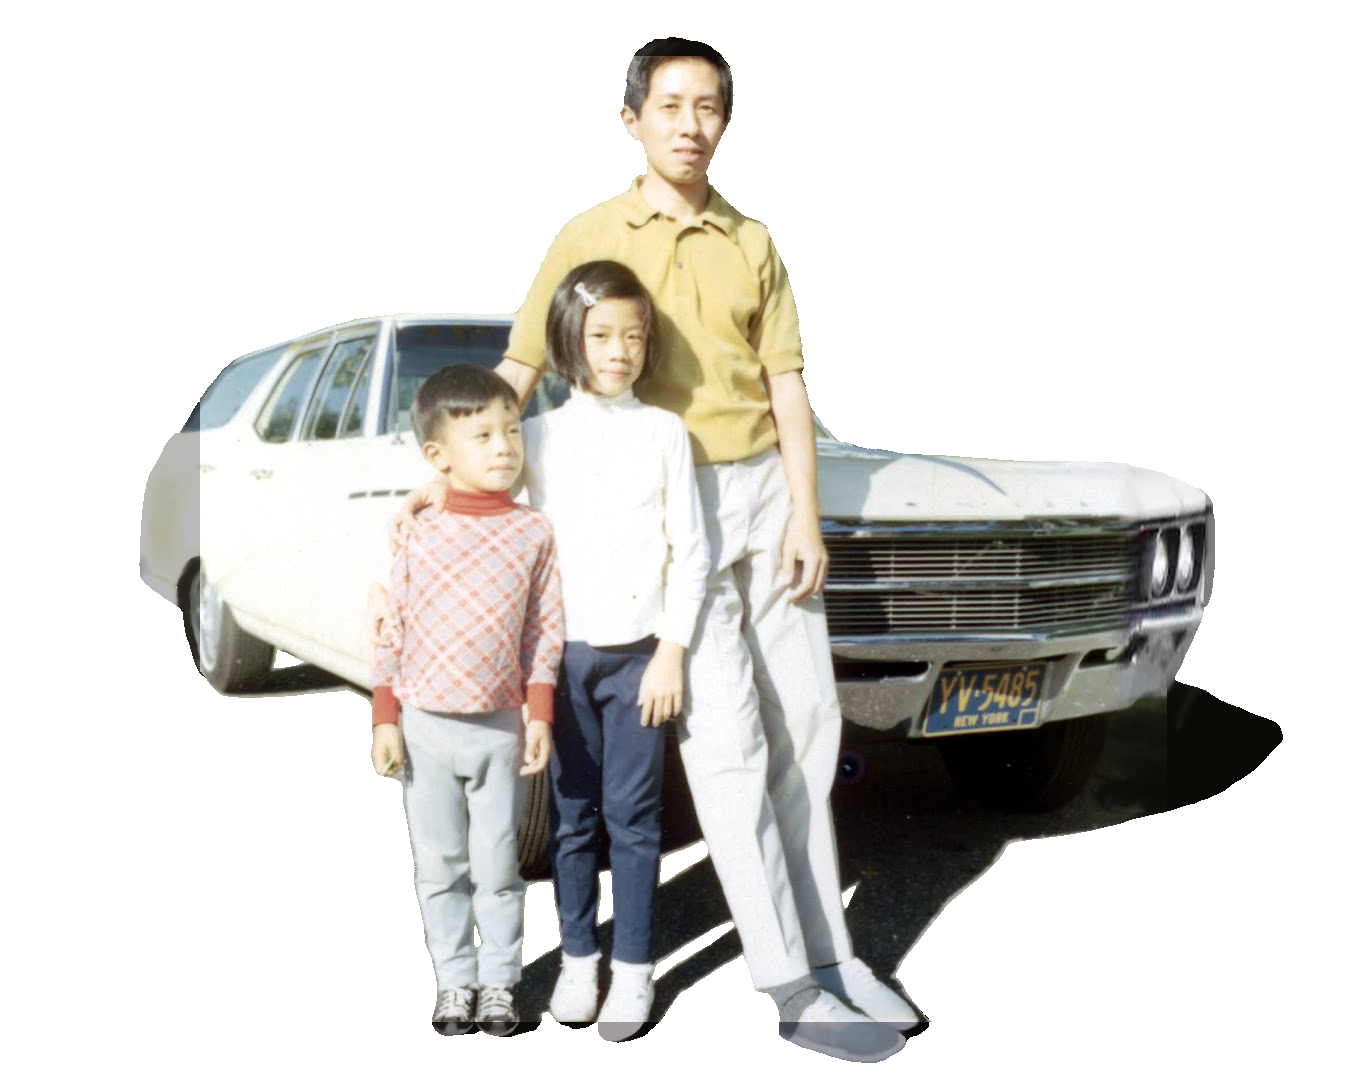
First let’s tackle the background removal. We need to erase all the trees and junk in the background and replace it with transparent pixels. I did all of this work in Photoshop with a simple manually drawn layer mask, but you could do this easily in any image editor (GIMP is a classic FOSS option.) Here’s the initial image with the background masked out:
To get this transparency processed properly when running the flow imager, we need to add the -tm argument. This tells the tool not to draw lines on the transparent sections.
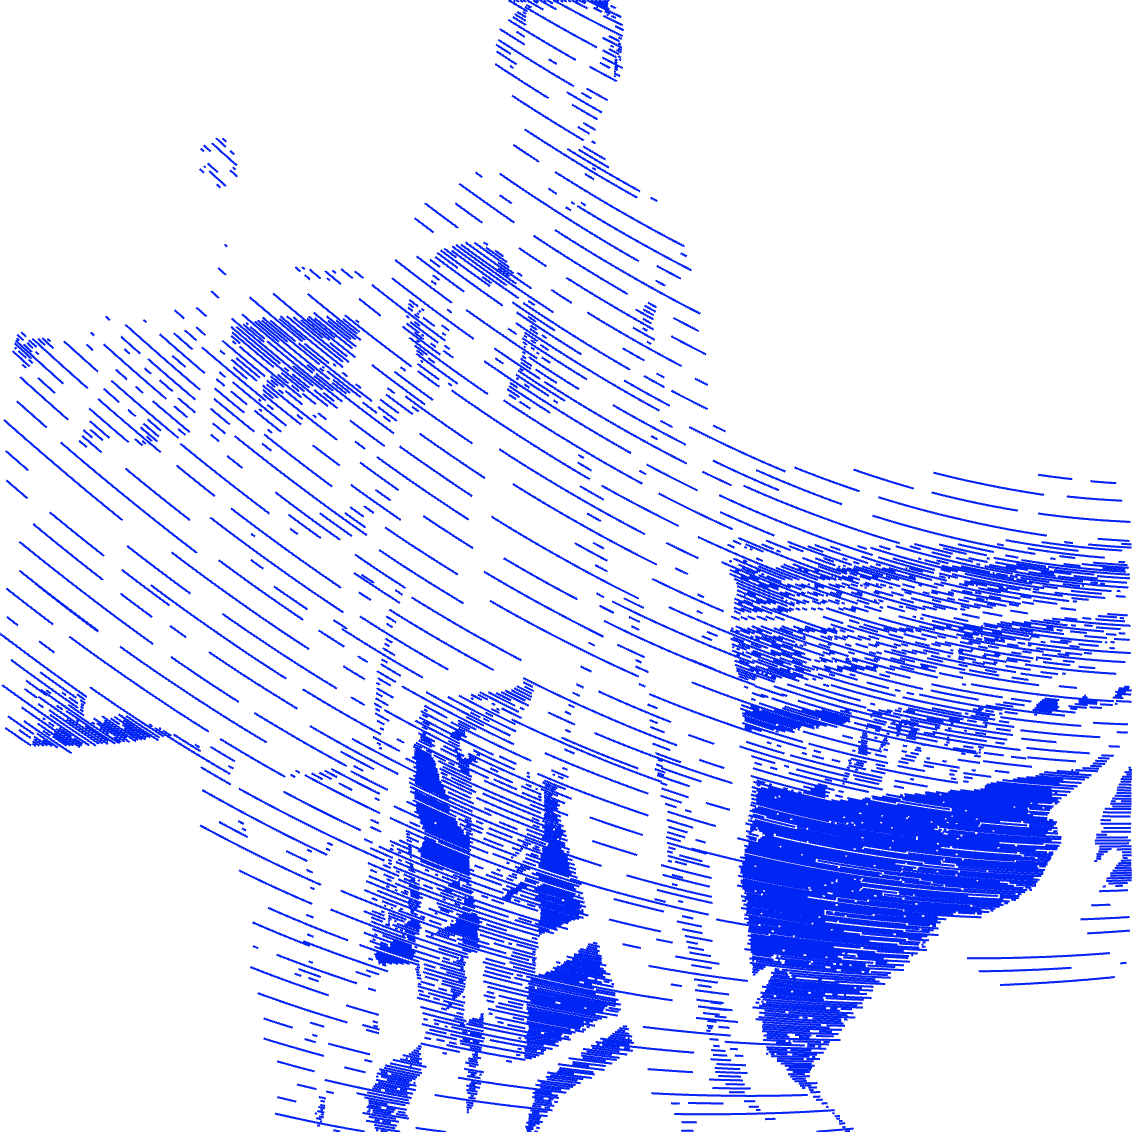
vpype flow_img -tm img_2.png write vector.svg
Well, the background is gone, but the result is still far from perfect. There are a few spots that I missed while masking that are very hard to see in the image, but are clearly highlighted in the vector file. I’ll go back and fix this by using the Photoshop threshold tool on the alpha channel to make pixels below a certain level of transparency fully disappear.
The removed background also makes it easier to notice that the original photo is a little cropped. My grandfather is missing the top of his head, the car is missing a headlight and its tail, and everyone is missing the tips of their shoes. We’ll need to go back and draw those in manually.
Drawing in the toes and hair just requires a rough color match and guesstimated shape. Please ignore the fact that the drawn parts are much darker. I’m writing this recap out of order - when I actually drew these pieces in, I had already done the next step of color correction, so I was matching different colors.
For the missing pieces of the car, we can go on google and find pictures of the same model of car from similar angles. Then, we can stitch them in using the skew, rotate, and perspective warp tools to help sell the illusion that they belong in the image. The end product doesn’t need to look perfect in image form, as the vectorization process smooths out a lot of rough handiwork. We just need to get the basic shapes and values in place.
vpype flow_img -tm img_3.png write vector.svg
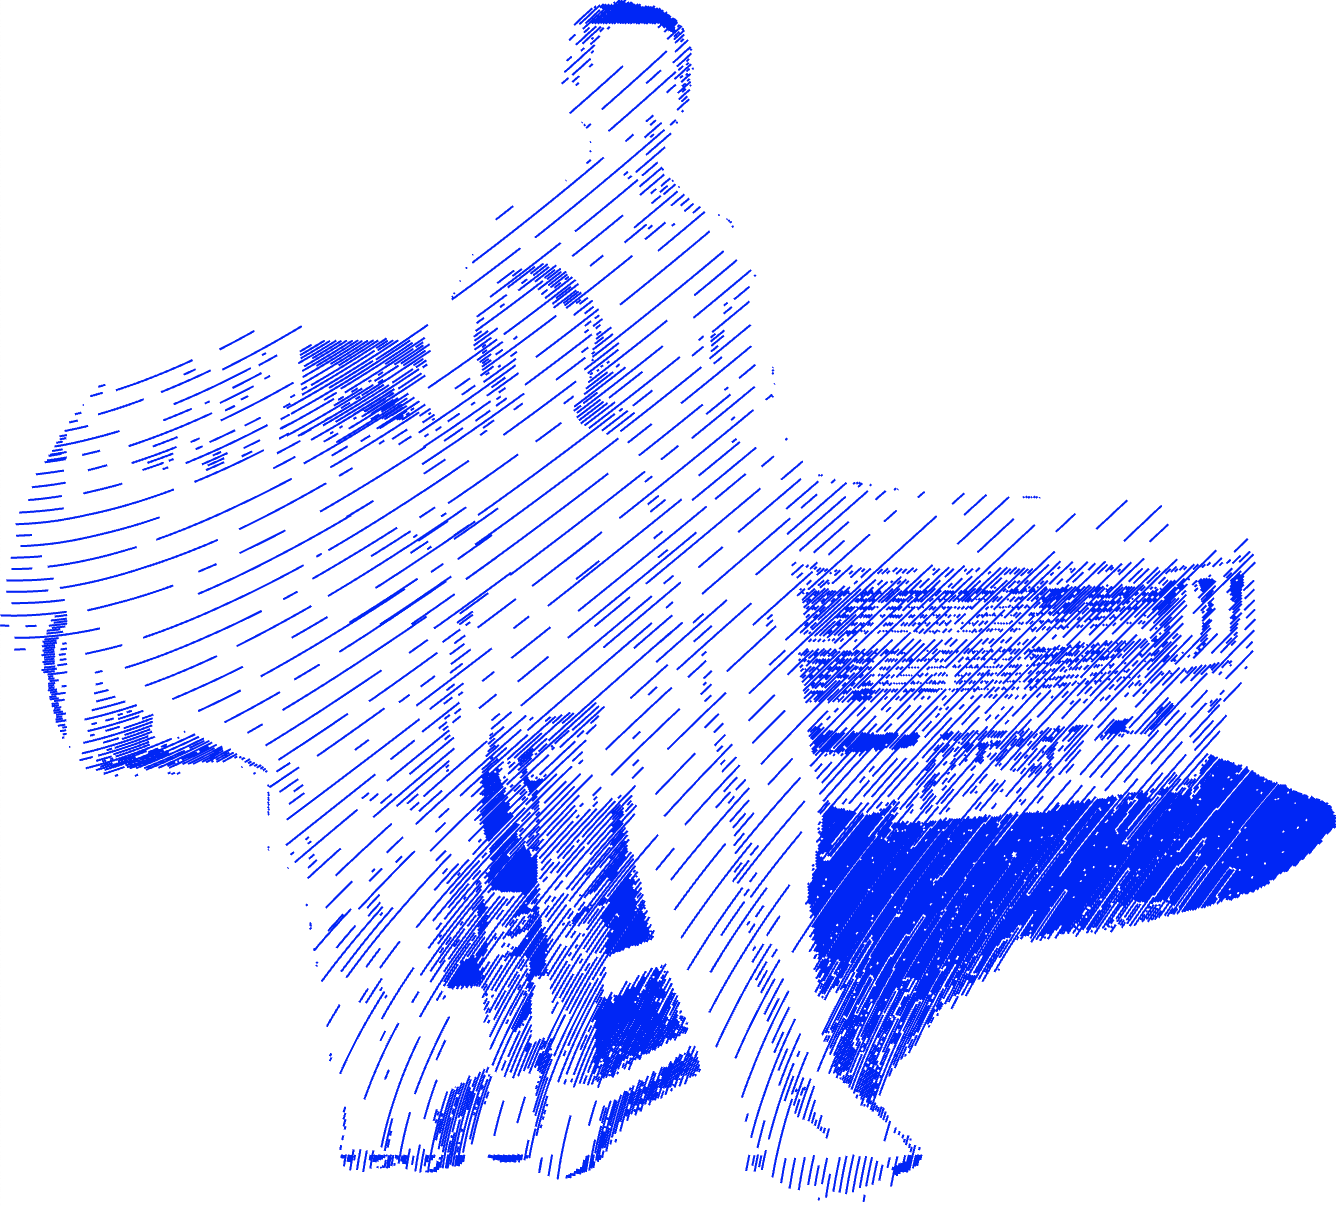
Looking good! Disregarding the accidental extra-dark regions, the only problem left to tackle is everyone’s lack of facial features. We can do this by messing with the image curves until we get a good level of contrast between eyes / mouths and the surrounding skin. We can also make use of masked adjustment layers to only adjust the brightness and contrast of certain parts of the image (eg. to change the brightness of the people with respect to the car.) There’s a lot of trial and error here, changing values and then vectorizing the image to see if we’ve gotten everything right. Here’s the final product:
vpype flow_img -kdt -ml 1 -Ml 200 -ms 1 -Ms 20 -tm --max_size 1600 -nc 0.0005 img_final.png write vector.svg
Take note that I add a couple extra flow imager arguments for this final step, mostly to modify the spacing and size of the flow lines. However, the output using these arguments is not visually far off from what you get when using the defaults. The flow imager docs are pretty solid at explaining all the parameters that are available, and you can get a lot more wild results by enabling things like the dark field multiplier, edge detection, and multiple flow field copies.
One thing that I found while doing this was that lines tend to overlap a lot in the darker sections of the image. This isn’t a bad thing necessarily, but it leads to some weird looking artifacts that I was afraid would show up in the final plotted piece. To solve this, I enable the kdtree search method with the -kdt flag, which performs a more exact check for overlapping neighbors when generating new lines. Unfortunately, this accuracy comes at the cost of much slower image processing.
Another thing to consider is that a new random flow field is generated each time you re-run the flow imager. This can have a significant impact on how the final vector file looks, so the quality of any given vectorization is kind of a crapshoot. The small scale of the eyes and mouths in this picture gave me a lot of difficulty, as even the slightest change in position of the generated lines can create widely varied facial expression on the subjects, or even remove facial features completely. Check out this one generation where a wormhole was formed in my dad’s face:
The best way I’ve found to combat this is just to re-run generation a ton of times, picking the nicest looking one at the end. Each full vector image generation takes about 20 minutes with all of my chosen options enabled, so I recommend running a few of them in parallel so you can go do other stuff while you wait. There may be some way to preview the generated flow fields at a lower resolution first and then regenerate the final image with the full quality options on, but I haven’t looked much into doing that.
As a final step, we can use some other vpype commands to clean up the vector file and get it ready for printing. By running vpype read vector.svg scaleto 9in 9in filter -m 1mm linesort write --page-size 11inx15in --center final.svg, we can scale the vector file to the right size, center it in the middle of an 11x15 page, and filter out any segments that are smaller than 1mm at the printed size (to clean up some more of those noisy overlapping lines I described above.) With that done, we can move on to actually plotting our vector file.
Plotting the Art
I don’t own a pen plotter, so finding a way to get the finished art piece onto paper was a bit challenging. As far as I can tell, there aren’t many companies that do on-demand pen plotting like Ponoko et al. do for laser cutting and engraving. I tried to get in contact with Bold Machines in New York, but they didn’t respond to me for a long time and then told me that they were closed until the winter, which I took as a sign to look elsewhere (though hopefully they’ve reopened!)
My next thought was to search around for pen plotter artists and who would be willing to plot my art. Eventually I found Paul Rickards, who agreed to help. He was super responsive and had great answers to my questions. I ended up buying two 11x17in plots for $250, which he finished and shipped out to me within a week (along with some small pieces of his own art, which was a really nice touch.) I know from my search that some artists prefer not to plot other people’s work, so I hope I’m not sending him unwanted business here, but otherwise highly recommend reaching out to him if you’re looking to take on a similar project.
Because I hope to make more plotter art eventually, I also considered buying an AxiDraw and doing the plotting myself. In the end, though, I felt I had enough junk filling up my apartment and didn’t want another clunky machine to gather dust. I also initially wanted a larger plot than the 11x17in max dimensions the AxiDraw supports, only changing my mind after I was pretty far into conversations with Paul. If I were to make a larger format plot in the future, I’d reach out to local universities and makerspaces to see if they have some sort of CNC XY table or similar I could attach a pen to. Commercial large format plotters also exist (mostly used for architectural and engineering drawings), but I think they mainly print on lighter weight, less art-focused rolls of paper.
Now that it’s done, I’m really happy with how the finished piece turned out. It’s a nice way to remember my grandfather, and it makes me smile every time I see it. I gave the second copy to my dad as a Christmas gift, and hope it’ll be a happy little memento for him as well.